Build Kit 1.0#
Installation#
Compatibility#
| Maya | 2019 | 2020 | 2022 |
|---|---|---|---|
| ✓ | ✓ | ✓ |
How to install#
-
Extract the RS_Assets folder from the RS_Assets.zip
-
Extract RS_Build_Kit.pyc either from RS_Build_Kit_M2020_and_below.zip or RS_Build_Kit_M2022.zip (depending on your Maya Version)
-
Copy RS_Build_Kit.pyc or RS_Build_Kit.py (Studio Version) and the RS_Assets folder to:
Attention
If an RS_Assets folder already exists in the location below, please copy the RS_Build_Kit folder (from inside the extracted RS_Assets folder) and paste it into the RS_Assets folder in the location below.
-
Launch / Restart Maya
-
In Maya, open a Python Tab in the Script Editor and execute :
Attention
Please make sure that there are no Space characters in front of each code line.
Environment Variables#
-
To set and use a custom folder location, please open the Maya.env file.
-
Add the following lines to the Maya.env file:
MAYA_SCRIPT_PATH = path\to\your\custom\script\folder PYTHONPATH = path\to\your\custom\script\folder RS_TOOLS_PATH = path\to\your\custom\script\folderAttention
- Replace path\to\your\custom\script\folder with the actual path to your scripts.
- Make sure there is no forward slash (/) or backward slash (\) at the end of the path.
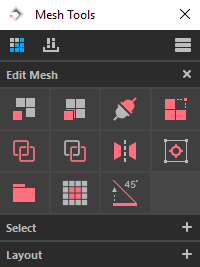
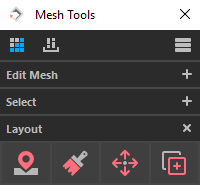
Interface Basics#
Tool Menu#
 Mesh / Selection / Layout tools
 Import / Export tools
 About / Links / Shortcuts
Tool Settings#
Indicator
A blue line underneath an icon indicates that optional tool settings are available.
How to open?
Open the settings with a RMB 2 click.
Position & What settings are open?
-
The settings widget will appear at the bottom of the tool.
-
The background of an icon button turns dark gray to indicate it's settings are currently open.
How to close?
To close the settings page RMB 2 click the active button again.
Tooltips#
- Hover over a button until a tooltip shows up.
- Tooltips include information about available Modifier Alt Ctrl Shift and RMB 2 settings options.
Please make sure that tooltips are enabled!
In Maya's main menu go to:
Windows > Settings / Preferences > Preferences > Interface > Help
and check DisplayToolClips under PopupHelp
Expand / Collapse tabs#
It is possible to expand or collapse all tabs on an active page.
Expand
Ctrl click on
or
Collapse
Alt click on
or
Note
A settings page will automatically close when expand or collapse all tabs is used.
Keyboard Shortcuts#
It is possible to control aspects of the tools interface with keyboard shortcuts.
Access pages
1 - Edit Mesh Page
2 - Import / Export Page
3 - About Page
4 - Toggle Tool Menu Visibility
Requirements
The tool needs to have focus, for the shortcuts to work.
Expand / collapse tabs
Ctrl + 1 to expand all tabs on the Edit Mesh Page
Alt + 1 to collapse all tabs on the Edit Mesh Page
Ctrl + 2 to expand all tabs on the Import / Export Page
Alt + 2 to collapse all tabs on the Import / Export Page
Attention
This only works on the currently active page.
Minimize to main menu
Alt + 4 to minimize the tool

About Page#
Access the About page by clicking on ![]()
The page contains information about the tool, several web links and an option to set up hotkey shortcuts.
Interface - About Page#
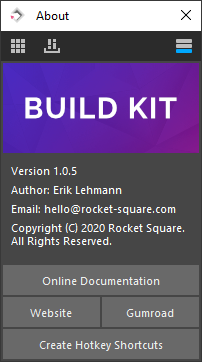
Create Hotkey Shortcuts#
Click on the Create Hotkey Shortcuts button to make multiple functions available within Maya's hotkey editor.
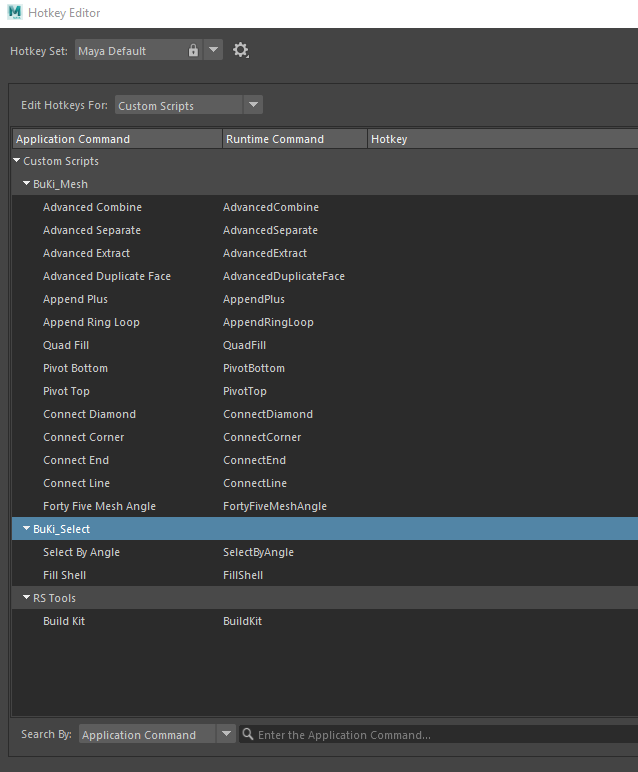
Info
Access the Hotkey Editor under Windows > Settings/Preferences > Hotkey Editor
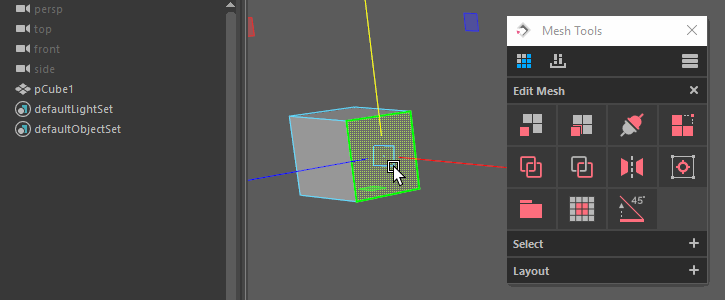
Edit Mesh#
Interface - Edit Mesh#
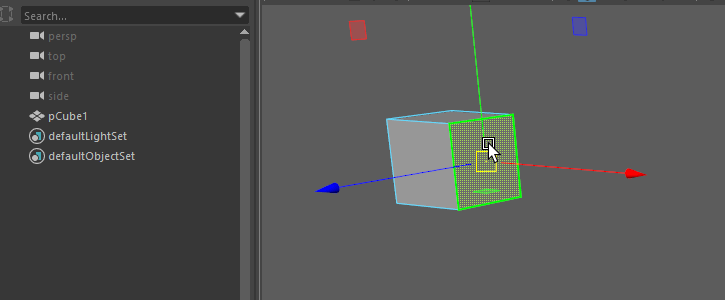
Extract  #
#
Advanced Extract operation
- Clean history (without empty groups)
- Keeps mesh name and adds an _Ext# suffix
- Remains under parent
- Centers pivot
How to use
- Select one or multiple faces
- Click on to run the script
Duplicate Face  #
#
Advanced Duplicate Face operation
- Clean history (without empty groups)
- Keeps mesh name and adds a _Dup# suffix
- Stays under current parent
- Centers pivot
How to use
- Select one or multiple faces
- Click on to run the script
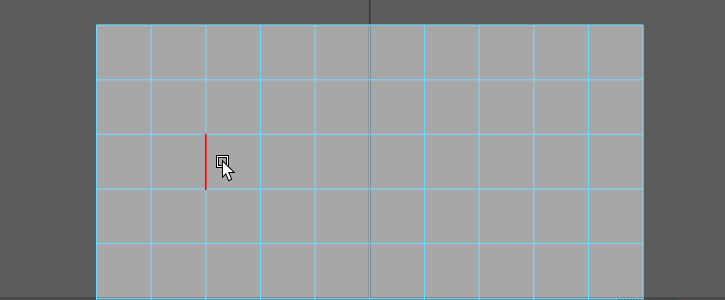
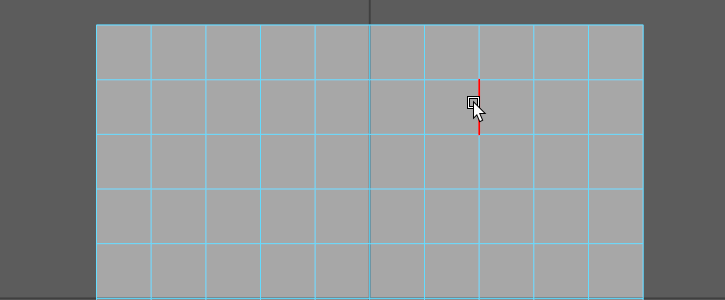
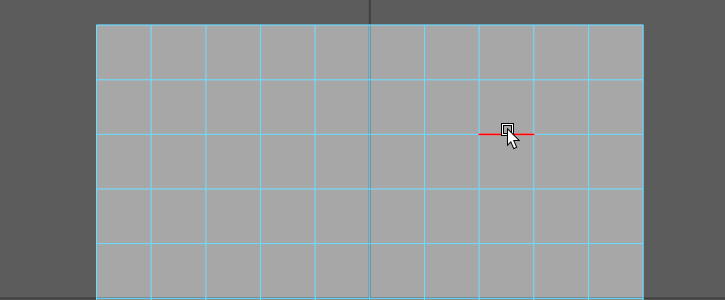
Connect  #
#
Various options to connect components.
-
Connect Line
How to use
- Select 2 edges from a ring loop
- LMB 1 click on
-
Connect Diamond
How to use
- Select a triangle face
- Alt click on

-
Connect Corner
How to use
- Select 2 corner edges from a quad polygon face
- Ctrl click on
-
Connect End
How to use
- Select 3 edges from a quad polygon face
- Shift click on
Append Plus  #
#
Enhanced poly append based on a vertex or edge input.
-
Append Poly
How to use
- Select one vertex in a corner of 2 edges
- LMB 1 click on

Caution!
When a face adjoins the newly created vertex that sits across from the selected vertex, the vertices won't be merged. Please use the Append Bridge operation to create a connecting poly face.

-
Append Bridge
How to use
- Select a border ring edge
- LMB 1 click on
-
Append Ring Loop
How to use
- Select two edges within a ring loop
- Alt click on

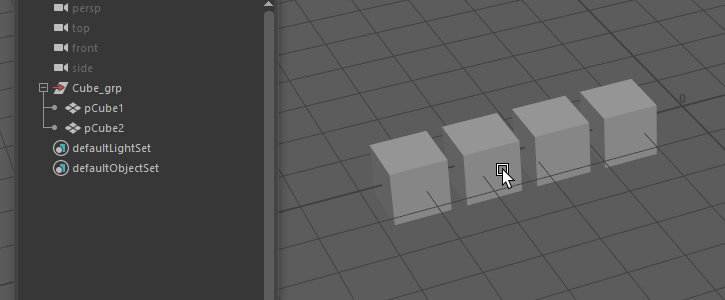
Combine  #
#
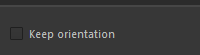
Advanced Combine operation
-
Clean history (without empty groups)
-
Keeps the name of the first selected object
-
Stays under current parent
-
Option to keep the orientation of the first selected object (See RMB 2 Settings)
-
When combining a single group, it keeps the group name
How to use
-
Select 2 or more objects or 1 or more groups
-
Click on
to run the script
Settings
Separate  #
#
Advanced Separate operation
-
Clean history (without empty groups)
-
Keeps mesh name and adds a _Sep# suffix
-
Stays under current parent
-
Centers pivots
How to use
-
Select 1 or more combined objects
-
Click on
to run the script
Mirror  #
#
-
Mirror - World
How to use
-
X-Axis: LMB 1 click on
-
Y-Axis: Alt click on
-
Z-Axis: Ctrl click on
Automatic prefix renaming
Objects / Groups that have L_ or R_ prefixes
will automatically be renamed when mirrored in the X-Axis.Examples
Groups

Objects

-
-
Mirror - Pivot
How to use
- Add Shift to Mirror from the current Pivot position
Attention
None of these mirror operations will merge vertices.
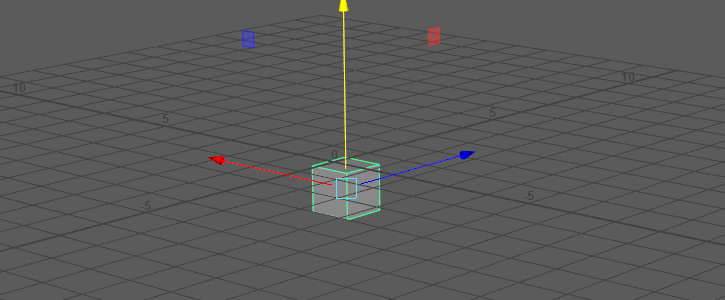
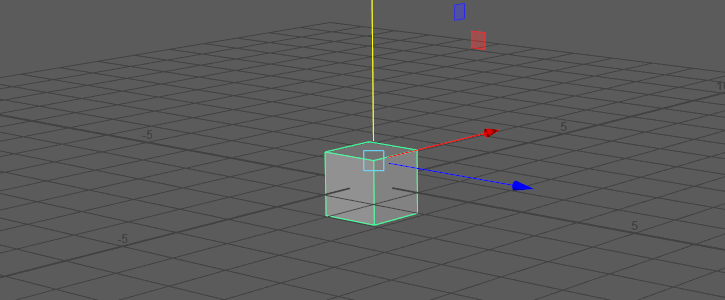
Pivot Position  #
#
Set pivot positions based on an objects bounding box.
How to use
Add Shift for opposite directions
Bottom: LMB 1 click on ![]()
Top: Shift + LMB 1 click on ![]()
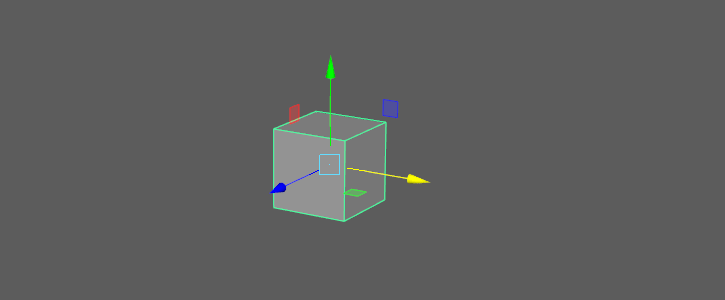
Front: Alt click on ![]()
Back: Shift + Alt click on ![]()
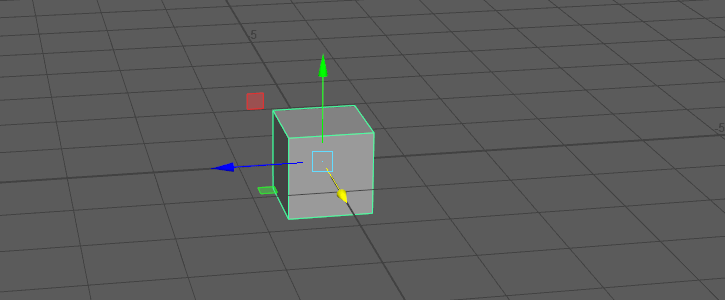
Right: Ctrl click on ![]()
Left: Shift + Ctrl click on ![]()

Center: Shift + Alt + Ctrl click on ![]()
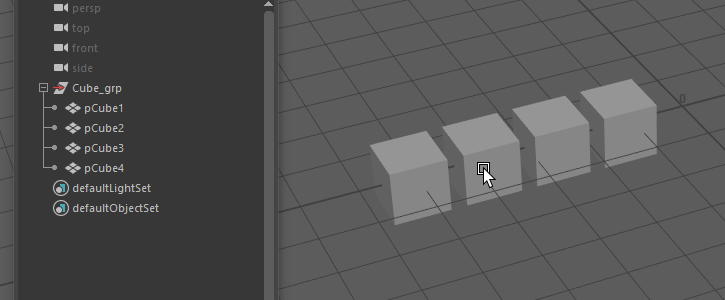
Groups  #
#
Group objects
- Group all or each object individually
- Automatically adds a "_grp" suffix
How to use
Add all objects to one group: LMB 1 click on ![]()
Add each object to an individual group: Alt click on ![]()
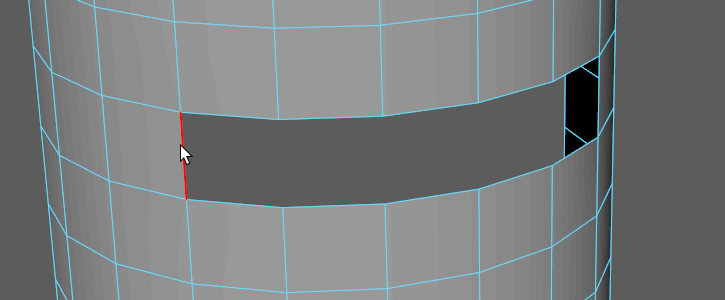
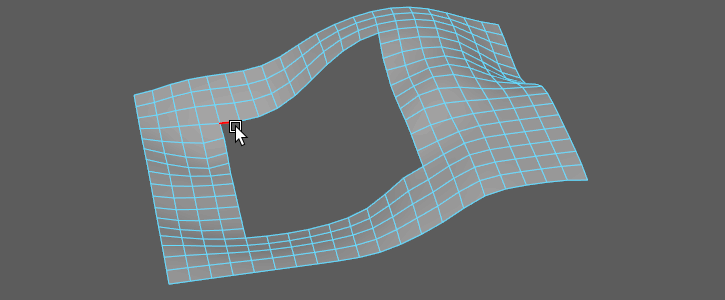
Quad Fill  #
#
Automatically fills a grid polygon hole with an equal edge side count.
Requirements
-
Make sure that Track selection order is enabled"

-
Opposite sides need to have the same edge amount
How to use
Select the 4 corner edges in a "Z" shape order
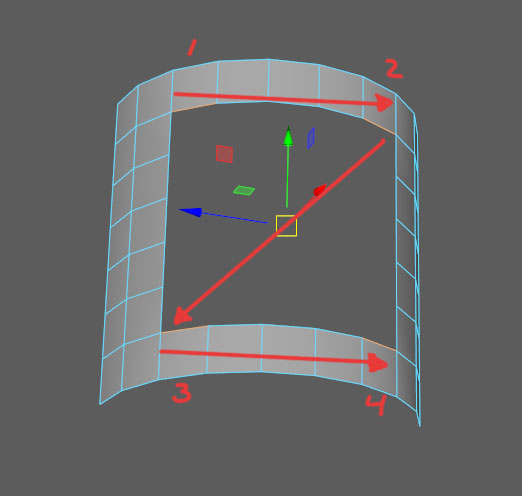
LMB 1 click on ![]()
Tip
If a mesh has curvature choose edges from the sides that best define the curvature
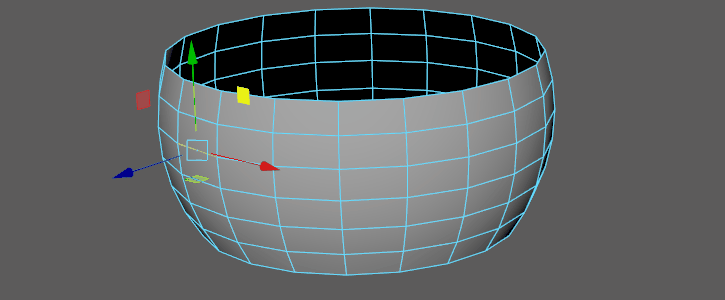
Examples
Plane area
Cylinder cap
Cylinder side with curvature
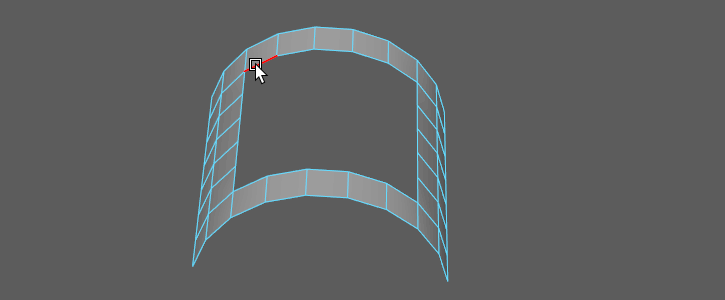
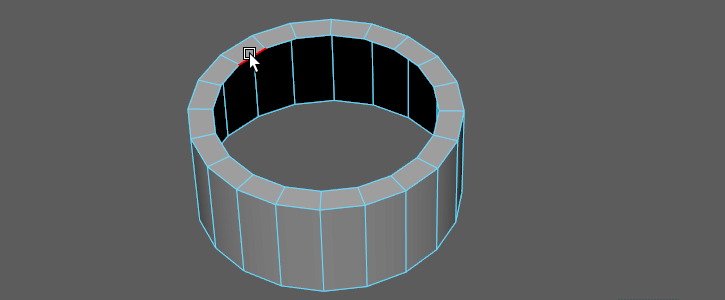
45 Mesh Angle  #
#
Rotate a face selection by 45° from a specified anchor point.
How to use
- Select one or multiple faces.
- Switch to multi select mode. (Hold RMB 2 and choose Multi)
- Add 1 edge, which will be the anchor point.
-
LMB 1 click on
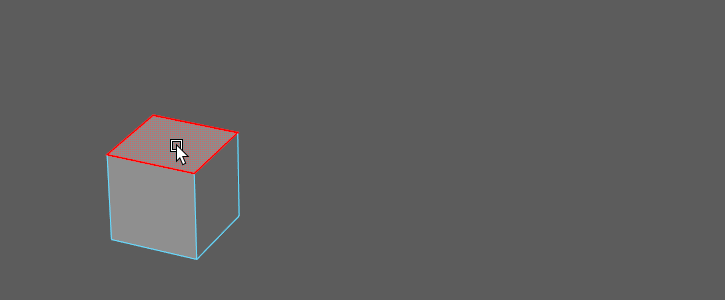
-
Choose how to proceed in the option window.
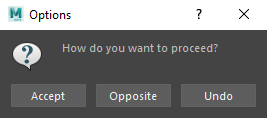
- Accept: Proceeds with the result on display.
- Opposite: Rotates the face selection in the opposite direction.
- Undo: Returns to the original state.
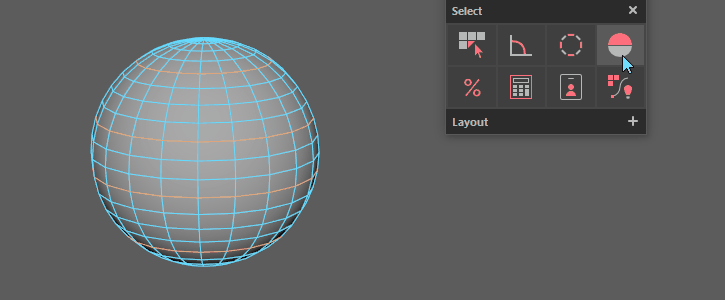
Select#
Interface - Select#
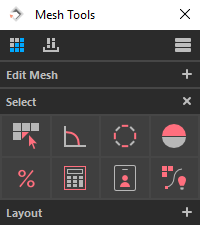
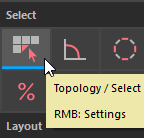
Topology  #
#
Analyze a mesh and find invalid polygon geometry.

How to use
- RMB 2 click to open the settings widget.
- Choose a geometry type from the settings page.
- LMB 1 click to run the script.
Tip
1 2 3 4 5 | |
Settings
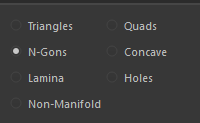
- Triangles (polygon with 3 sides)
- Quads (polygon with 4 sides)
- N-Gons (polygons with more than 4 sides)
- Concave (a polygon with one or more interior angles greater than 180°)
- Lamina (faces sharing all edges)
- Holes
- Non-Manifold (geometry that cannot be unfolded)
Angle  #
#
Grow a polygon face selection based on a set edge normal angle.

How to use
- RMB 2 click to open the settings widget.
- Set an angle value within the settings page.
- LMB 1 click to run the script.
Tip
Use the slider to interactively change the angle.
Settings
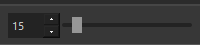
Attention
If used as a shortcut through the hotkey editor, the angle value is always 15°.
The angle value and the interactive slider can only be used with and within the tool.
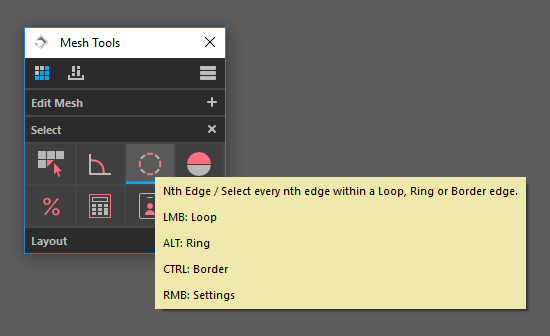
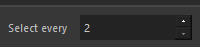
Nth Edge  #
#
Selects every nth edge within a Loop, Ring or Border edge.
How to use
Settings
Fill Shell  #
#
Temporarily cut a mesh with an edge selection and select one or multiple of the resulting shells.
How to use
- Make a loop or any closed edge selection
- Click to start the process
- Choose one or multiple shell(s)
- Press Ok in the option window to end the process.
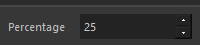
Percentage  #
#
Randomly selects a specified percentage from the current object selection.
How to use
Settings
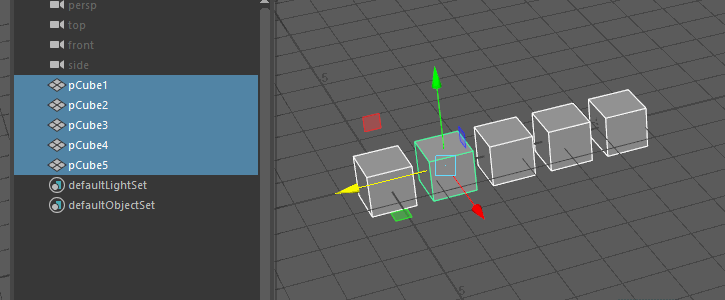
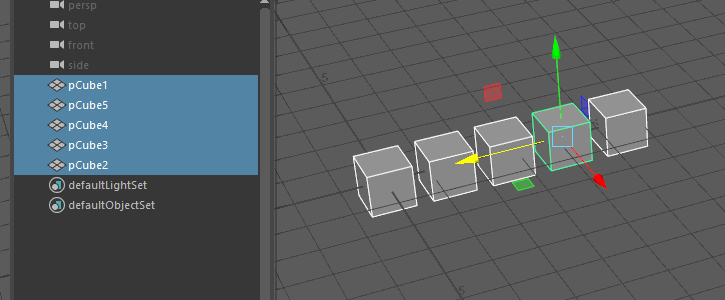
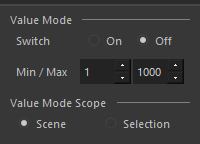
Component Count  #
#
Find objects that have the same component count as the selected source or specify a poly count range.
How to use
-
Choose a mode
A. Based on a source object
- Select an object (the source)
B. Based on a value range
- RMB 2 click to open the settings widget
- Switch On value mode
- Set a poly count range
- Specify the search scope
-
Choose a component type
- Face - LMB 1 click
- Vertices - Alt click
- Edges - Ctrl click
- UVs - Shift click
- Face - LMB 1 click
Settings
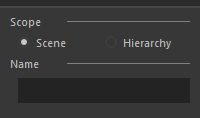
Name  #
#
Search and select objects by name or characters.
How to use
Settings
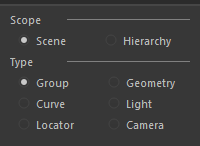
Type  #
#
Search and select objects by type.
How to use
Settings
Layout#
Interface - Layout#
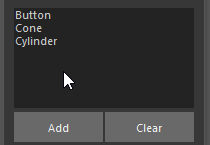
Place  #
#
Place source meshes on a target mesh, right under the mouse cursor location.
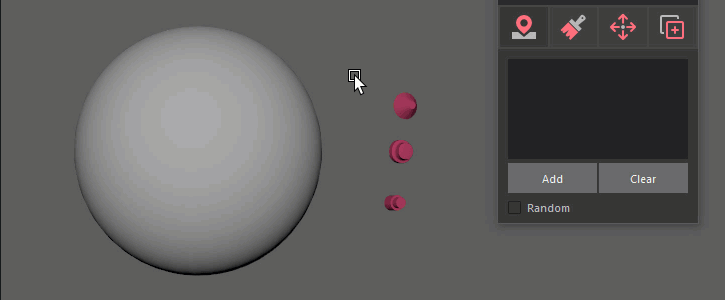
How to use
- RMB 2 click to open the settings widget
- Add one or multiple objects to the list
- Use Del to remove items
- Click on Clear to empty the whole list
-
Select list items to make them available for placement
-
Check Random to place the objects in a random order
- LMB 1 click to run the script
Tip
Check the source objects Y-axis orientation and set a desired pivot location (the point where it gets placed on the target mesh) before adding it to the list.
Settings
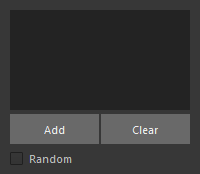
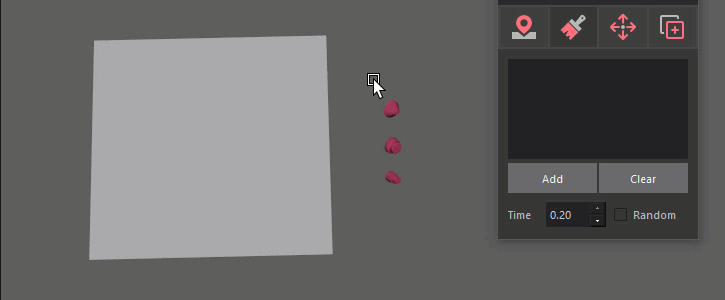
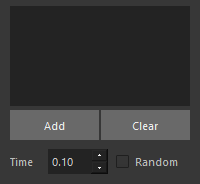
Paint  #
#
Paint source meshes on a target mesh.
How to use
- RMB 2 click to open the settings widget
- Add one or multiple objects to the list
- Use Del to remove items
- Click on Clear to empty the whole list
-
Select list items to make them available for paint placement
-
Change the time value to control the paint density.
Lower value (Min: 0.01) = faster placement.
Higher value (Max: 0.20) = slower placement. - Check Random to place the objects in a random order
- LMB 1 click to run the script
Tip
Check the source objects Y-axis orientation and set a desired pivot location (the point where it gets placed on the target mesh) before adding it to the list.
Settings
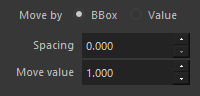
Distribute  #
#
Distribute overlapping objects or groups based on their bounding box or a value.
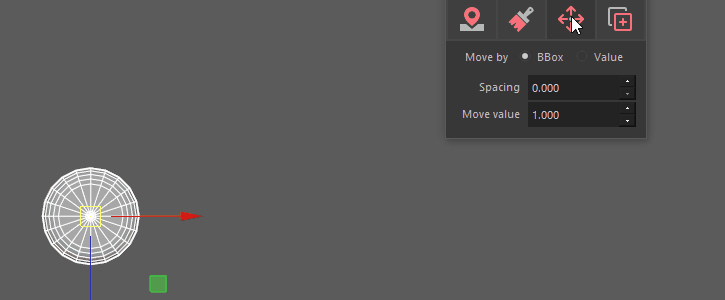
How to use
- RMB 2 click to open the settings widget
- Select a distribution mode, based on their Bounding Box (BBox) or by Value
- Option to add Spacing between the objects
- Enter a Move value for Value mode
- Select 2+ overlapping objects or groups
- Choose an axis
- X-Axis - LMB 1 click
- Y-Axis - Alt click
- Z-Axis - Ctrl click
- Add Shift for negative direction
- X-Axis - LMB 1 click
Settings
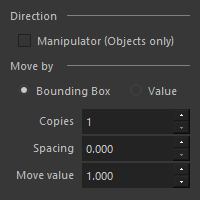
Duplicator  #
#
Distribute object or group duplicates based on their bounding box or a value.
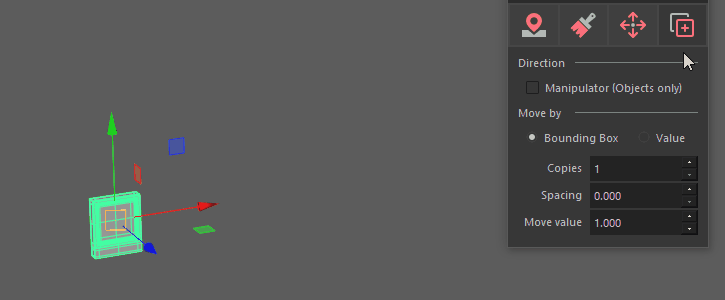
How to use
- RMB 2 click to open the settings widget
- Option to duplicate in the objects Manipulator direction (Only works with objects)
- Select a duplicator mode, based on their Bounding Box or by Value
- Option to add Spacing between the objects
- Enter a Move value for Value mode
- Select an object or a group
- Choose an axis
- X-Axis - LMB 1 click
- Y-Axis - Alt click
- Z-Axis - Ctrl click
- Add Shift for negative direction
- X-Axis - LMB 1 click
Settings
Import / Export#
Interface - Import / Export#
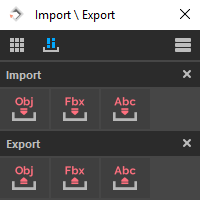
Import#
Import .obj files
Import .obj files as a combined mesh, separated meshes or as Blendshapes.
Load the objExport plugin
- Go to Windows > Settings/Preferences > Plug-in Manager
- Search for objExport.mll
- Check Loaded and Auto load
How to use
Settings

Import .fbx files
Load the fbxmaya plugin
- Go to Windows > Settings/Preferences > Plug-in Manager
- Search for fbxmaya.mll
- Check Loaded and Auto load
How to use
- LMB 1 click
 to run the script
 - Navigate to the file location and select files to import
Import .abc files
Load the AbcImport plugin
- Go to Windows > Settings/Preferences > Plug-in Manager
- Search for AbcImport.mll
- Check Loaded and Auto load
How to use
- LMB 1 click
 to run the script
 - Navigate to the file location and select files to import
Export#
Export .obj files
Load the objExport plugin
- Go to Windows > Settings/Preferences > Plug-in Manager
- Search for objExport.mll
- Check Loaded and Auto load
How to use
- RMB 2 click
 to open the settings widget
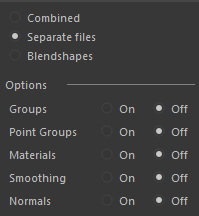
- Choose an export mode
- Set the preferred options to On or Off
- Select objects to export
- When the Export mode is set to As blendshapes, select objects that have blendshapes
- LMB 1 click to run the script
- Navigate to the save location
- When the Export mode is set to Combined, enter a file name
Settings
Export .fbx files
Load the fbxmaya plugin
- Go to Windows > Settings/Preferences > Plug-in Manager
- Search for fbxmaya.mll
- Check Loaded and Auto load
How to use
Settings
Export .abc files
Load the AbcExport plugin
- Go to Windows > Settings/Preferences > Plug-in Manager
- Search for AbcExport.mll
- Check Loaded and Auto load
How to use
- RMB 2 click
 to open the settings widget
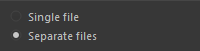
- Choose an export mode
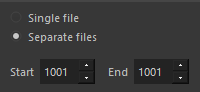
- When objects are animated, set Start and End values for the time slider.
When not, leave the default values.
- Select objects to export
- LMB 1 click to run the script
- Navigate to the save location
- When the Export mode is set to Single file, enter a file name
Settings