Shader Kit 2.0#
Installation#
Compatibility#
| Maya | 2019 | 2020 | 2022 | 2023 | 2024 | 2025 | 2026 |
|---|---|---|---|---|---|---|---|
| ✓ | ✓ | ✓ | ✓ | ✓ | ✓ | ✓ |
How to install#
-
Extract the RS_Assets folder from the RS_Assets.zip
-
Extract RS_Shader_Kit.pyc from RS_Shader_Kit_MAYAVERSION.zip (depending on your Maya Version)
-
Copy RS_Shader_Kit.pyc or RS_Shader_Kit.py (Studio Version) and the RS_Assets folder to:
Attention
If an RS_Assets folder already exists in the location below, please copy the RS_Shader_Kit folder (from inside the extracted RS_Assets folder) and paste it into the RS_Assets folder in the location below.
-
Launch / Restart Maya
-
In Maya, open a Python Tab in the Script Editor and execute :
Attention
Please make sure that there are no Space characters in front of each code line.
Environment Variables#
-
To set and use a custom folder location, please open the Maya.env file.
-
Add the following lines to the Maya.env file:
MAYA_SCRIPT_PATH = path\to\your\custom\script\folder
PYTHONPATH = path\to\your\custom\script\folder
RS_TOOLS_PATH = path\to\your\custom\script\folder
Attention
- Replace path\to\your\custom\script\folder with the actual path to your scripts.
- Make sure there is no forward slash (/) or backward slash (\) at the end of the path.
Interface Basics#
Tool Menu#
![]() Shader Manager / Utilities
Shader Manager / Utilities
![]() Save / Load Shader lists
Save / Load Shader lists
![]() Create Menu settings
Create Menu settings
![]() About / Links / Shortcuts
About / Links / Shortcuts
Tool Settings#
Indicator
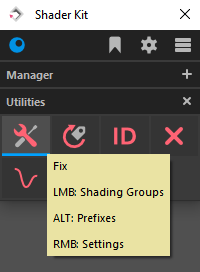
A blue line at the bottom of a button indicates that optional tool settings are available. Also keep an eye on the tooltip indicators: RMB: Settings
How to open?
Open the settings with a RMB 2 click.
Position & What settings are open?
-
The settings widget will appear at the bottom of the tool.
-
The background of an icon button turns dark gray to indicate it's settings are currently open.
How to close?
To close the settings page RMB 2 click the active button again.
Tooltips#
- Hover over a button until a tooltip shows up.
- Tooltips include information about available Modifier Alt Ctrl Shift and RMB 2 settings options.
Please make sure that tooltips are enabled!
In Maya's main menu go to:
Windows > Settings / Preferences > Preferences > Interface > Help
and check DisplayToolClips under PopupHelp
Expand / Collapse tabs#
It is possible to expand or collapse all tabs on an active page.
Expand
Ctrl click on
![]()
Collapse
Alt click on
![]()
Note
A settings page will automatically close when expand or collapse all tabs is used.
Menu Settings#
Save / Load#
Info
Save and load Shader lists that include assigned labels.
How to use
- Save: LMB 1 click on

- Load: Alt click on
Please note!
This saves the list and the assigned labels. It is not ex- or importing the actual Shaders.
Create Settings#
Info
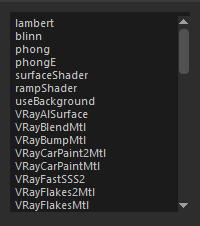
Choose what Shaders are available within the Create Menu List.
How to use
-
Click on
 in the tool menu to open the Create Menu Settings window.
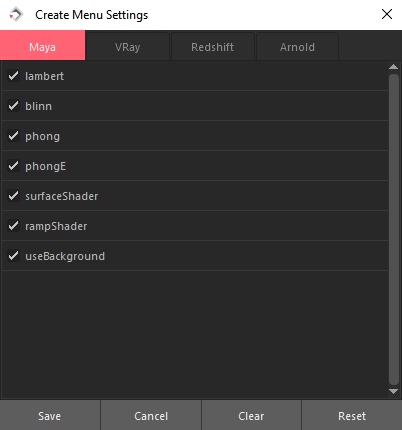
-
The tool automatically detects what render engines are available.
-
Select the Shaders that you want to have access from within the Create Menu List
-
Buttons
- Save: Saves the selection and updates the Create Menu list
- Cancel: Discards all changes and closes the window
- Clear: Unchecks all Shader selections
- Reset: Checks all Shader to restore the initial state
Saved Create Menu List Settings
The settings selection will be saved as the new default and is available every time you launch the tool.
About Page#
Access the About page by clicking on ![]()
The page contains information about the tool, several web links and an option to set up hotkey shortcuts.
Interface - About Page#
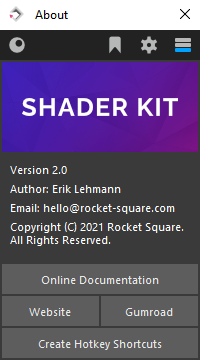
Create Hotkey Shortcuts#
Click on the Create Hotkey Shortcuts button to make a Shader Kit launch function available within Maya's hotkey editor.
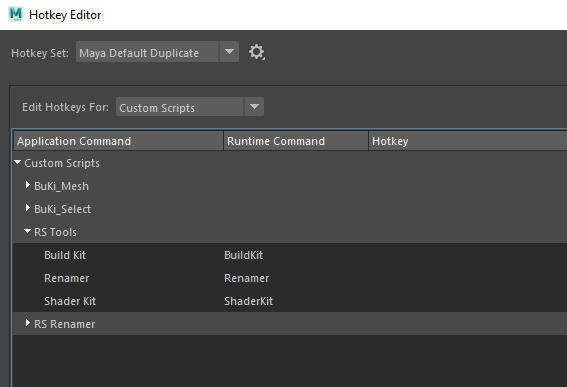
Info
Access the Hotkey Editor under Windows > Settings/Preferences > Hotkey Editor
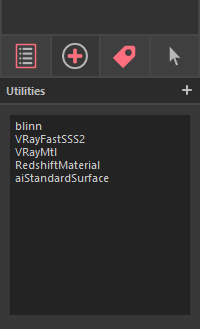
Supported Render Engines#
-
Maya (Default)
-
Arnold
-
Redshift
-
VRay
Note
The tool automatically detects available render engines.
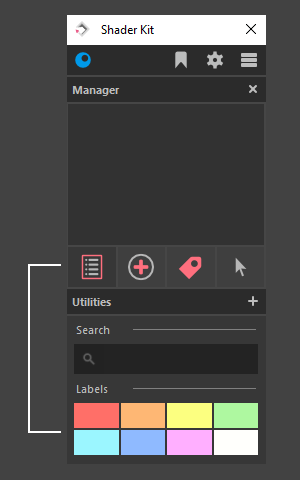
Shader Manager#
Interface: Manager#
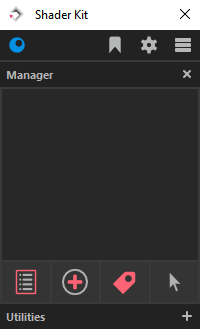
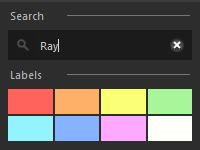
List  #
#
How to use
Settings
-
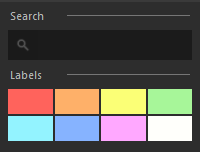
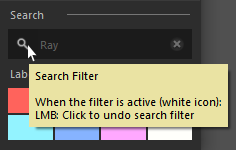
- Enter a search string and press the Enter key to activate the naming filter
Search by name:
Attention
When a filter is active several functions like Renaming, using the List or Create Button etc. are not available until the filter is cleared.
- To undo the filter, click on the magnifying glass to the left of the search string.
-
Assign a label:
- Select one or multiple shaders from the list
- Click on a label color to assign the label
List Operations#
How to use
- Select Shader:
- LMB 1 click on one or multiple list items to select a Shader
- Delete Shader:
- Select one or multiple list items and press the Del key to delete the Shader(s)
-
Move Items:
- Up: Select one or multiple items and press the Up Arrow ( ↑ ) key to move the Shader upwards in the list
-
Down: Select one or multiple items and press the Down Arrow ( ↓ ) key to move the Shader downwards in the list
-
Resize Shader list:
- Extend list size vertically: Alt click the Manager Header to extend the list
- Shrink list size vertically: Ctrl click the Manager Header to shrink the list
-
Extend list size horizontally: LMB 1 click / hold the window border and drag it to the desired size
Filter By Label#
How to use
- LMB 1 click on a label color to apply a filter that only lists Shaders that have the clicked label color assigned
- To undo the filter, LMB 1 click again on a label color

Attention
When a filter is active several functions like Renaming, using the List or Create Button etc. are not available until the filter is cleared.
Create  #
#
How to use
Settings
Assign  #
#
How to use
- LMB - Assign Shader to Objects:
- Select one or multiple Object(s)
- Select one Shader from the Shader list
- LMB 1 click to assign the Shader
- ALT - Assign Shader to Faces:
- Select one or multiple Face(s)
- Select one Shader from the Shader list
- Alt click to assign the Shader
- CTRL - Randomly Assign Shader to objects:
- Select multiple Objects
- Select multiple Shader from the Shader list
- Ctrl click to randomly assign Shaders
Select  #
#
How to use
- LMB - Open Attributes
- Select a Shader from the Shader List
- LMB 1 click to open the Shaders attributes
- ALT - Select Objects
- Select a Shader from the Shader List
- Alt click to select all objects that have the selected Shader assigned
- CTRL - Select Objects with the same Shader:
- Select an Object
- Ctrl click to select all objects with the same Shader assigned to them
- SHIFT - Select Shader from current Object:
- Select one object
- Shift click to select the object's Shader within the Shader list
Utilities#
Interface: Utilities#
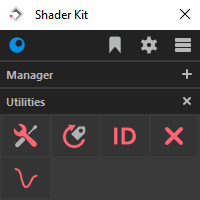
Fix Prefixes / Shading Groups  #
#
Automatically correct Shading Group names and / or remove pasted__ or exported__ Shader name prefixes.
How to use
Reassign Shader  #
#
Automatically reassigns all Shaders to fix accidental assignments to polygon faces.
How to use
- For selection:
- Select one or multiple Objects
- LMB 1 click to reassign Shader
- Entire scene:
- Alt click to reassign the Shader of all objects within the scene
- Alt click
Material ID  #
#
Creates 9 Material ID Shader, each with a unique color.
Info
Colors: Blue, Cyan, Green, Magenta, Orange, Purple, Red, Turquoise, Yellow
How to use
- Create Lambert ID Shader:
- LMB 1 click
- LMB 1 click
- Create Surface ID Shader:
- Alt click
- Alt click
- Delete ID Shader:
- Shift click
- Shift click
Delete Unused Nodes  #
#
Deletes all unused shading nodes in your scene.
How to use
- LMB 1 click
Graph Materials  #
#
Graph the shading networks
How to use
- Open the Hypershade Editor
- Graph Material from selected Objects:
- Select one or multiple objects
- LMB 1 click to graph the shading networks
- Add selected list item to graph:
- Select one or multiple Shader from the Shader List
- Alt click
- Remove selected nodes / list items from the Graph:
- Select one or multiple nodes and / or Shader list items
- Ctrl click
- Show Input and Output connection of selected Nodes:
- Select one or multiple nodes
- Shift click